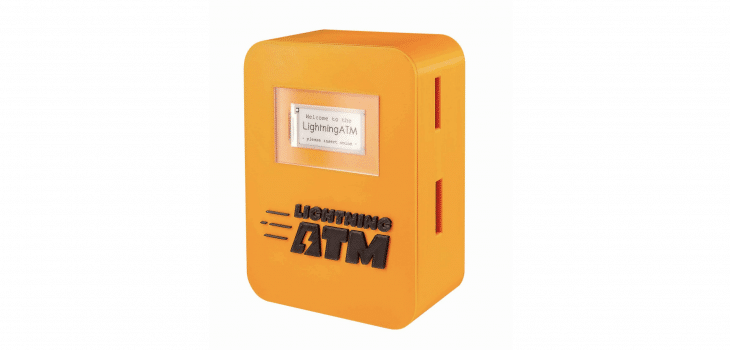
The LightningATM – Pocket Edition
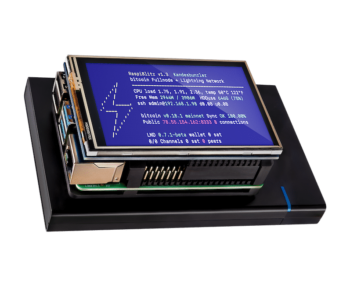
The LightningATM is a fully functional Bitcoin ATM. It was invented, designed and improved by @21isenoug.
The product itself and its documentation is outstanding. We invite you to go down another rabbit hole in the Bitcoin universe.
The LightningATM – Documentation
The LightningATM – Github
In July, a new project was born – the Pocket Edition, as 21isenough announced on Twitter:
This was not only the first Bitcoin LightningATM, as it also became the first ToGo Bitcoin ATM. The Pocket Edition is way smaller and the hardware requirements have decreased as well.
You don’t need the camera or the button for the Pocket Edition. So, you not only save space, but you also save some money to stack more sats.

But there are more hardware changes
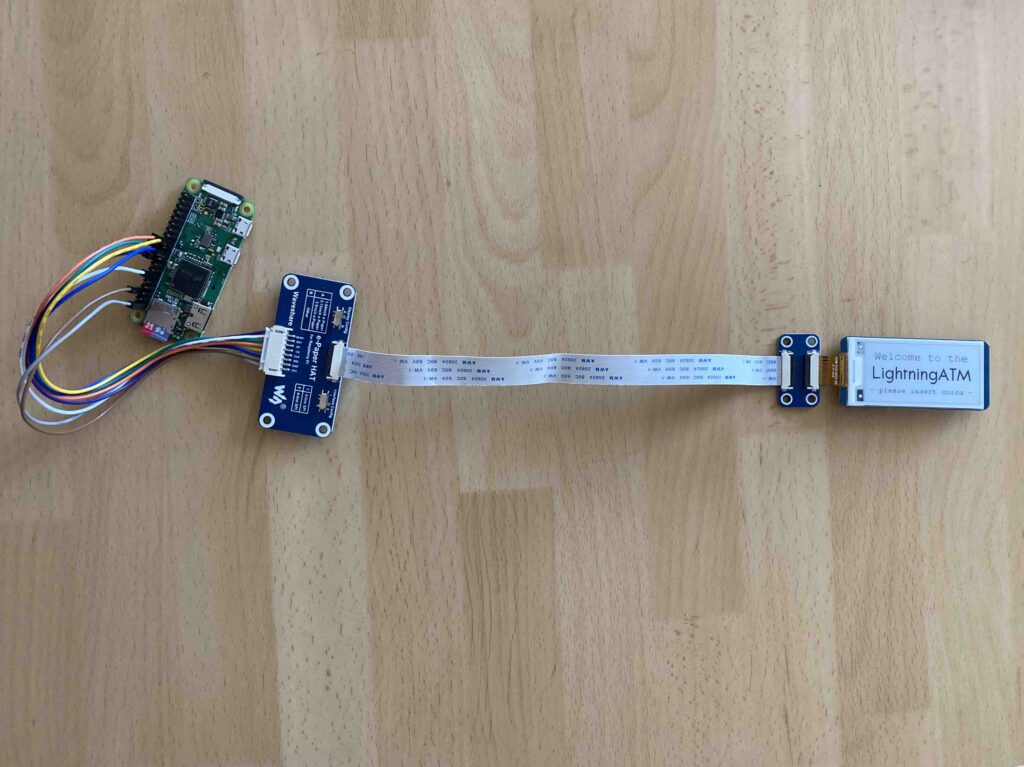
Due to less space inside the case you also need another display for this version of The LightningATM.
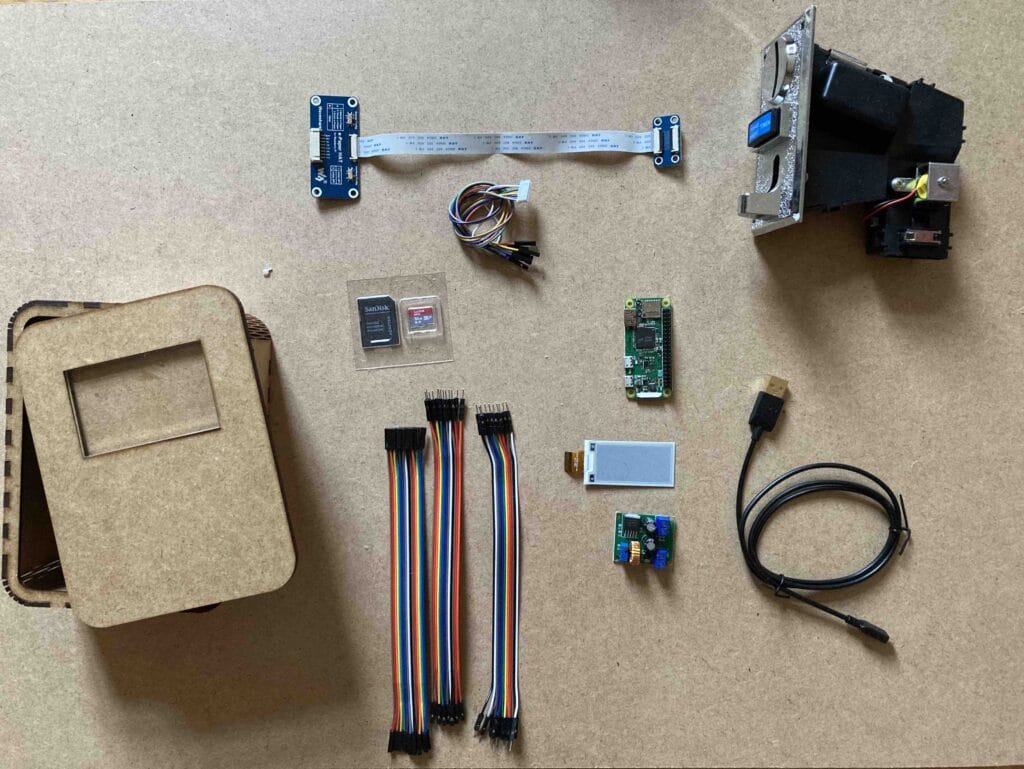
It is recommended to use the Waveshare 2.13in display. You‘ll also need an adapter for a band cable. Otherwise, you will have trouble placing the display correctly in the case.
To be honest, I am not the “deep tech guy” and had some trouble setting this up, so I decided to write this guide to help others out there. If anything is not clear or if you find any mistakes, please reach out to me. This guide will be updated accordingly.
1. Correct wiring (detailed plan see 1.1)
You need to connect the screen adapter with the Raspberry Zero. For that you take the included jumper connector with 8 jumper cables.
There are 8 colors:
- Purple
- White
- Green
- Orange
- Yellow
- Blue
- Brown
- Grey
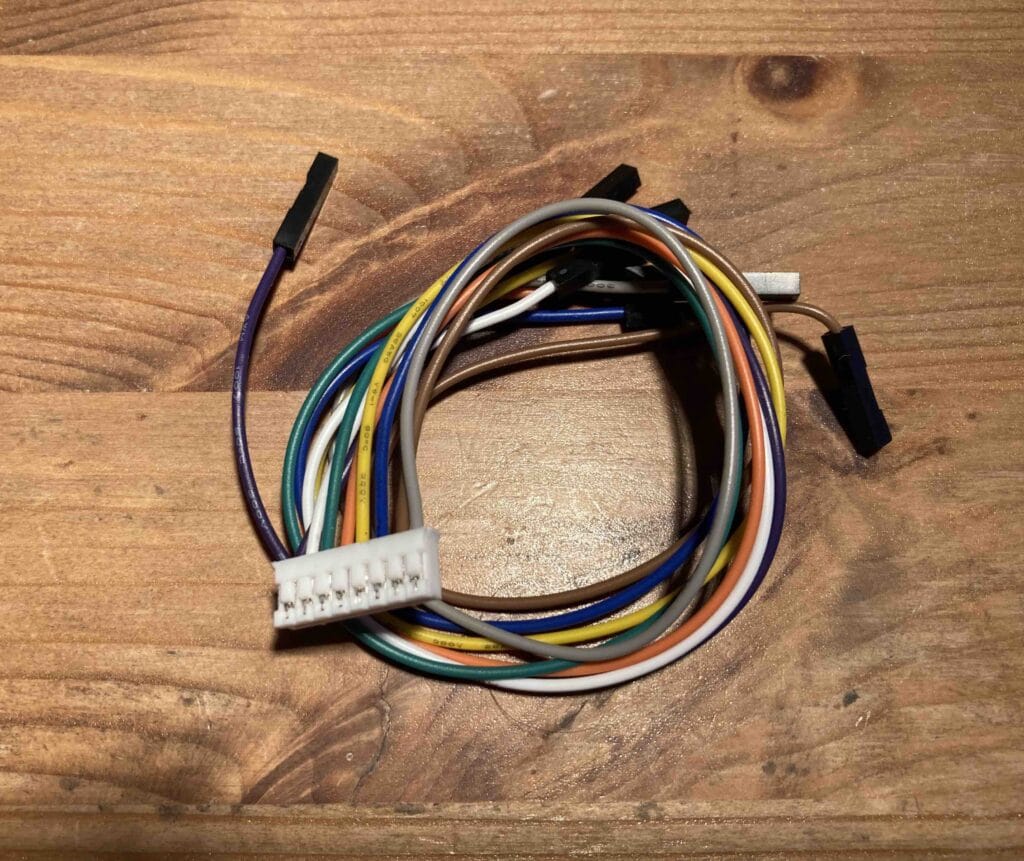
I followed this wiring plan when setting up the display (old version/new one below):
| Jumper cable color | Pin on the Pi Zero board |
| Grey | 3.3V (1) |
| Brown | GND (6,9,14,…) |
| Blue | 19 |
| Yellow | 23 |
| Orange | 24 |
| Green | 22 |
| White | 11 |
| Purple | 18 |

1.1 Detailed plan for different versions
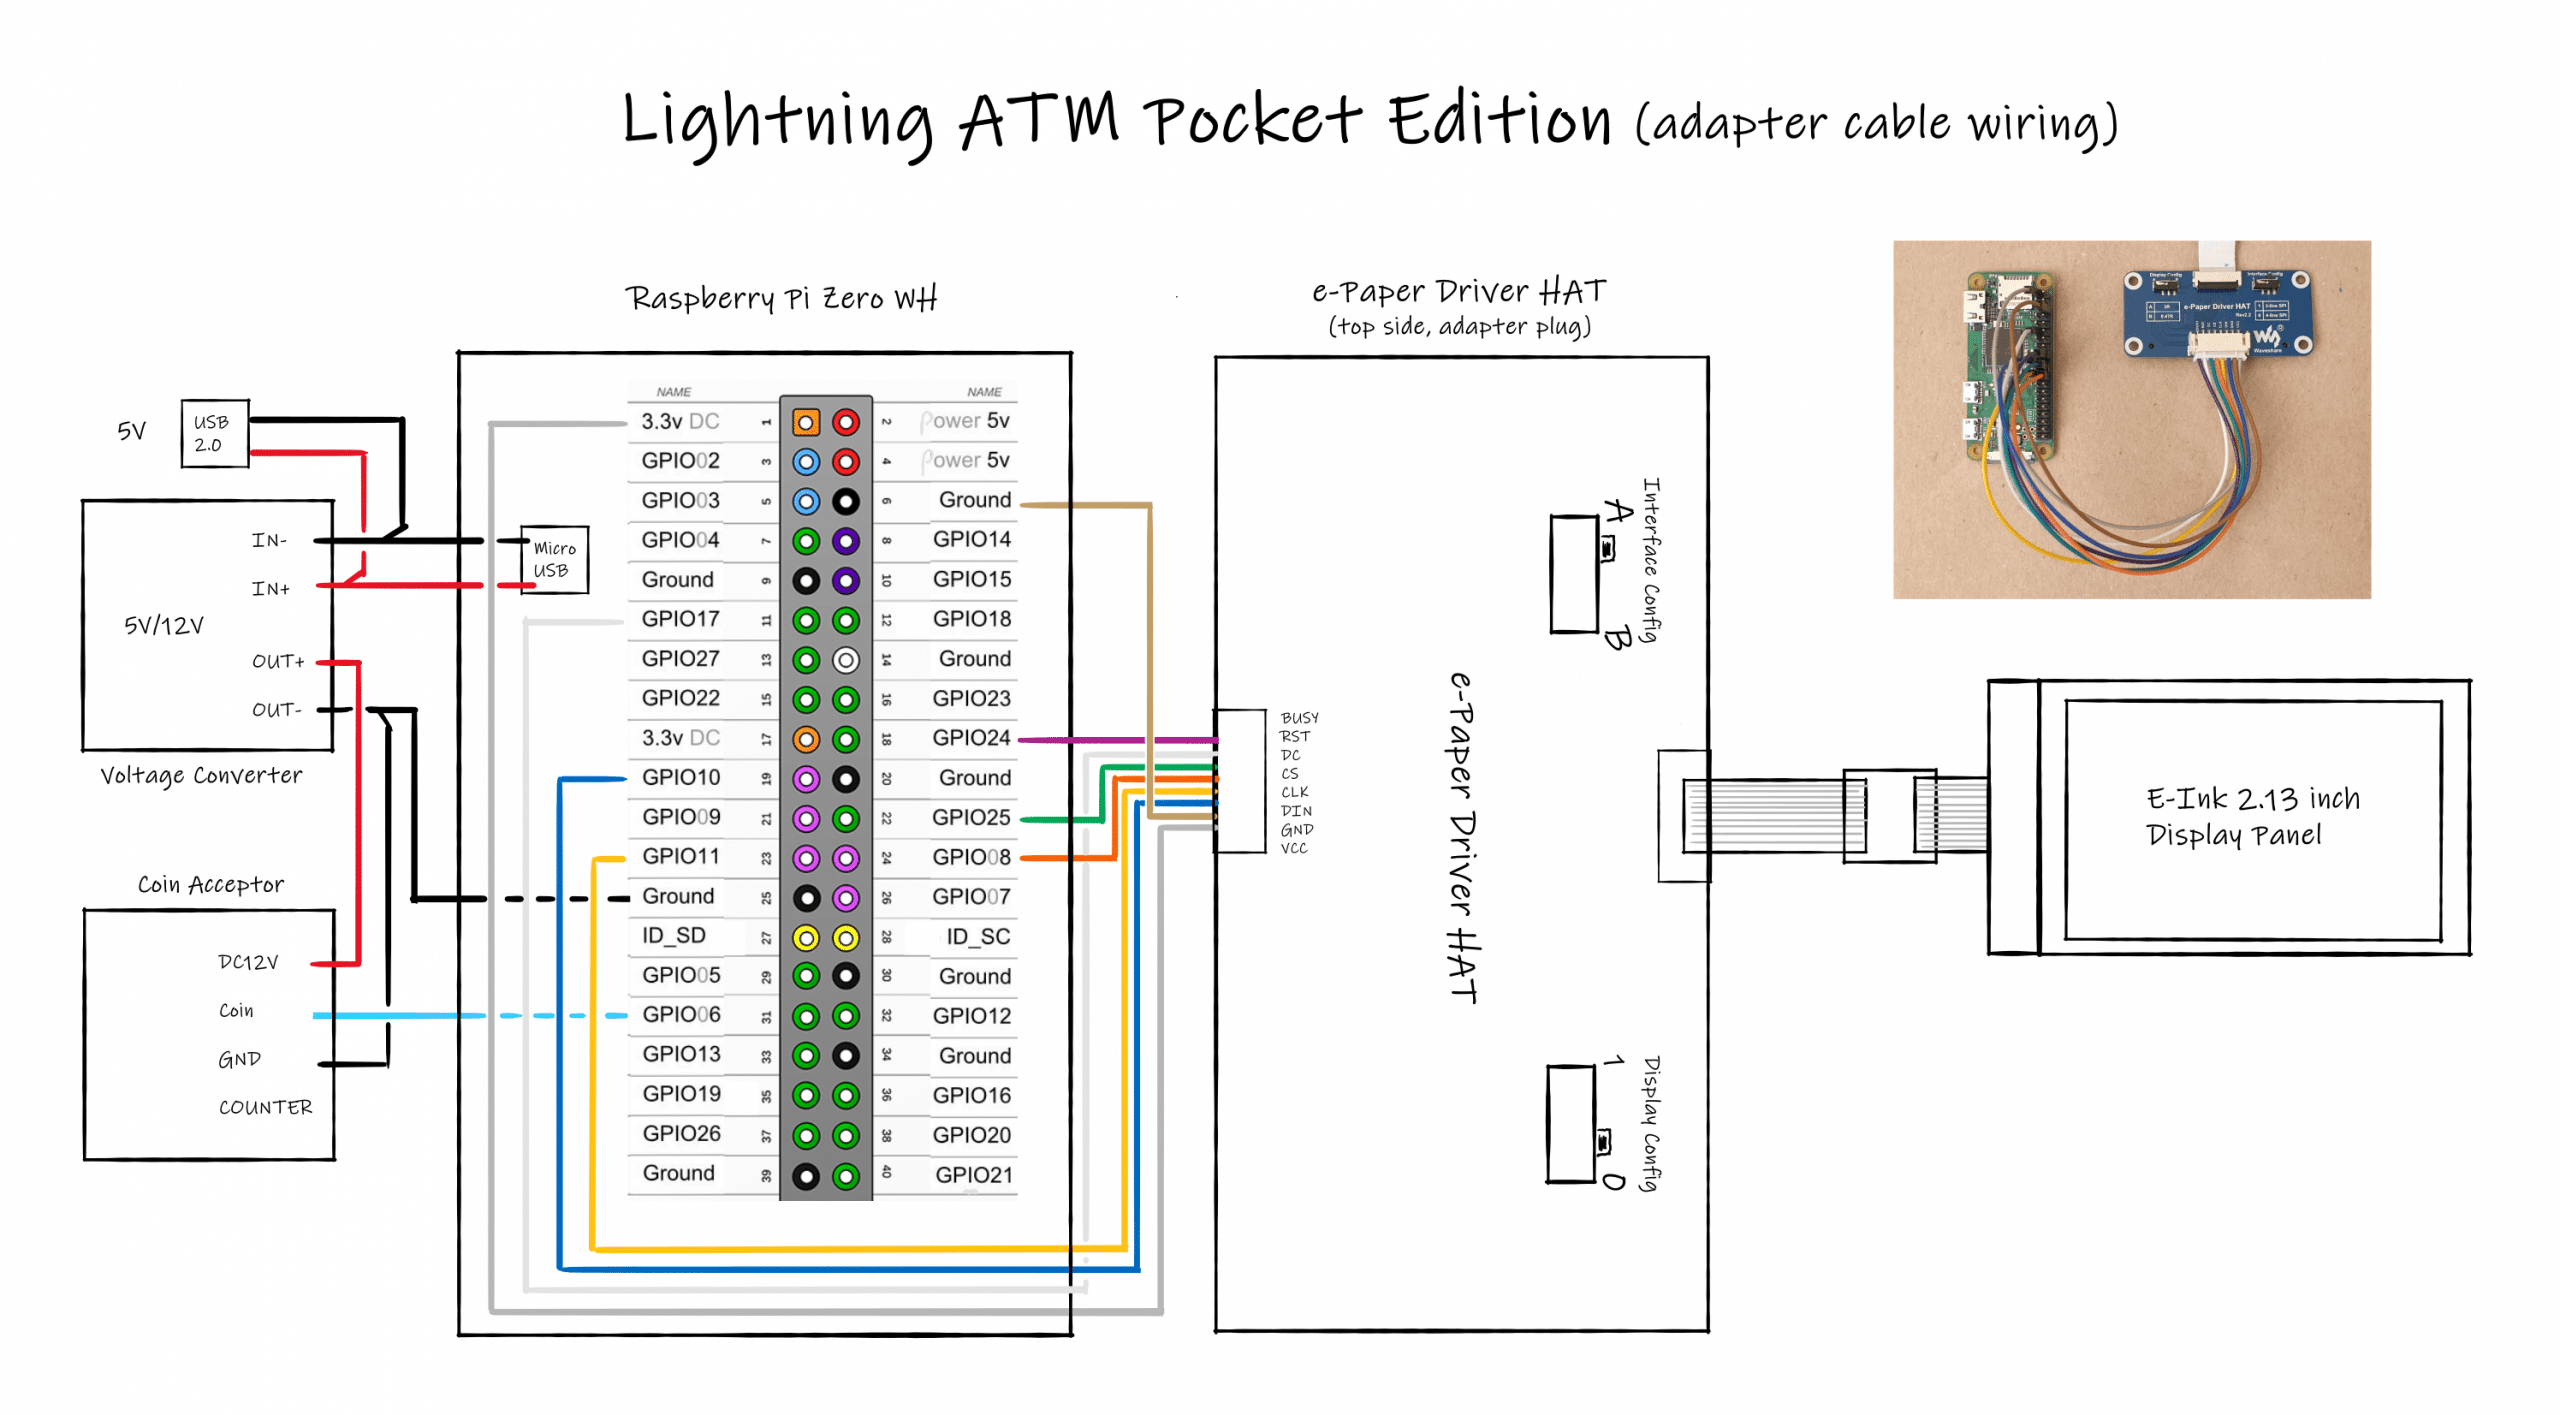
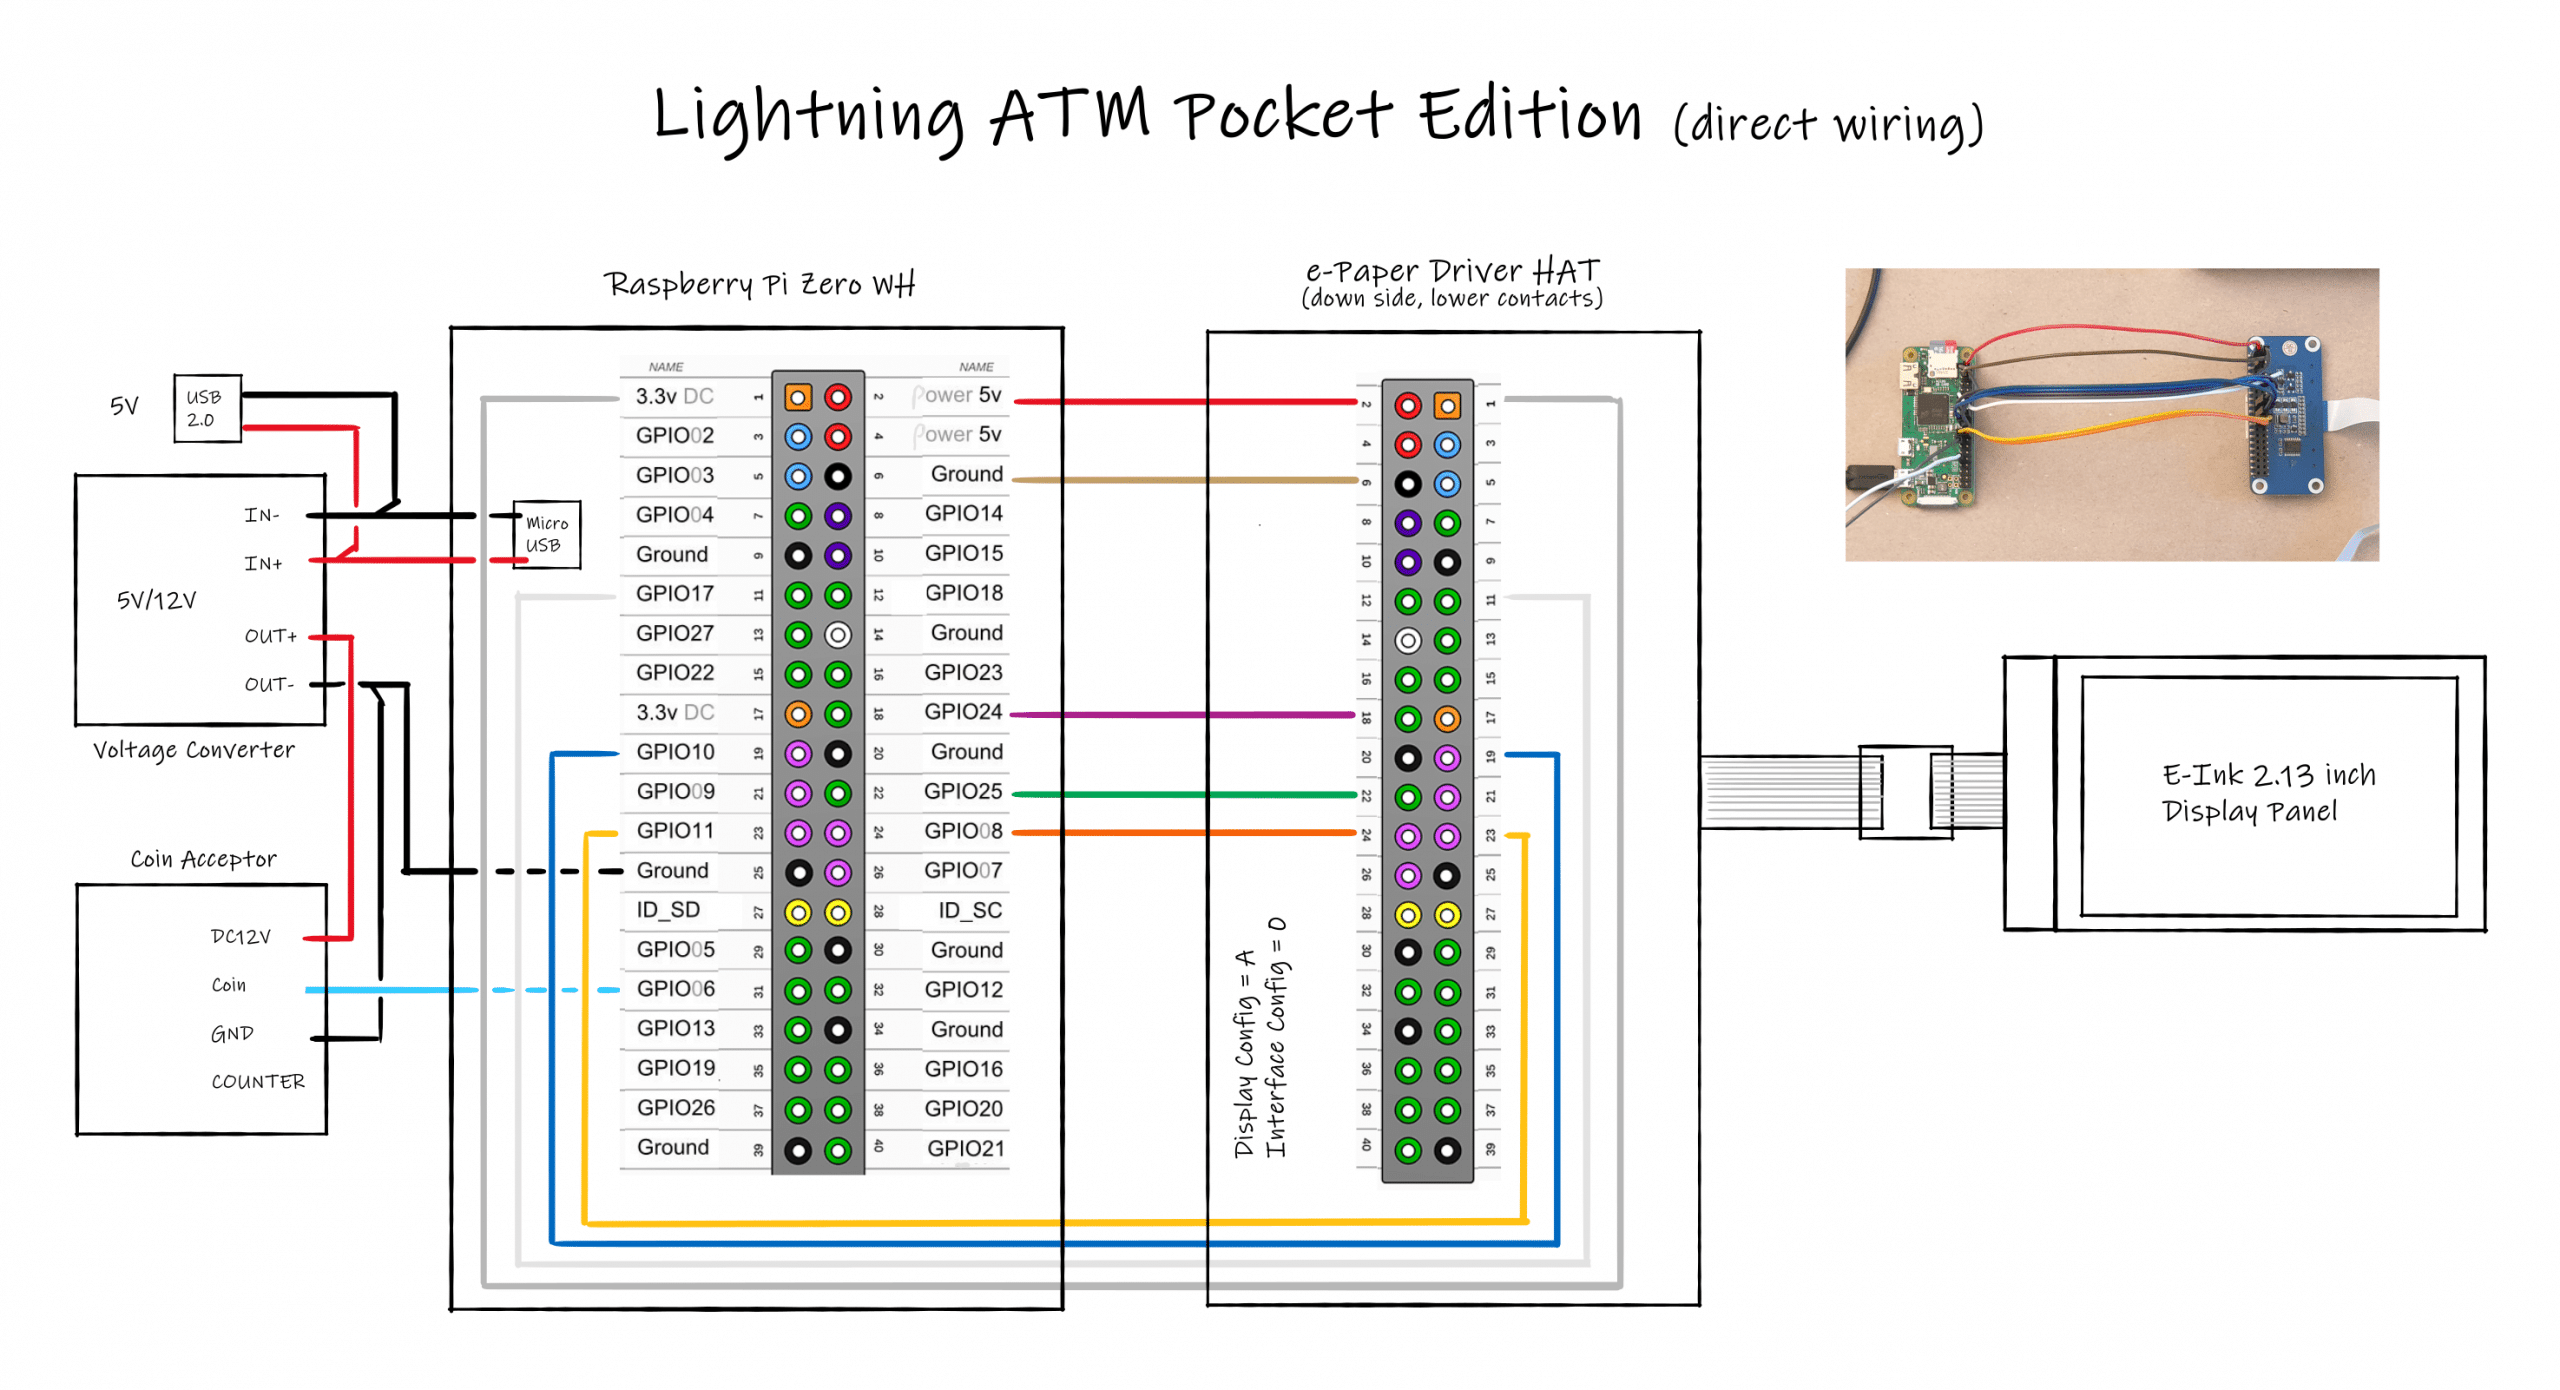
Once you have checked twice that you have connected the cables with the right pins you can proceed to the software setup.
2. Software setup
Make sure you have followed all the steps in the official documentation to the end before you proceed.
Keep in mind that the Pocket Edition is an extension of the original Lightning ATM. So, we’ll only need a few additional steps.
First you have to install the waveshare Python library.
Execute the following commands:
$ cd ~
$ git clone https://github.com/waveshare/e-Paper
$ cd ~/e-Paper/RaspberryPi*/python/
$ sudo python3 setup.py install
If you want to test for the correct installation and correct wiring of your display you can use the example programs included in the library.
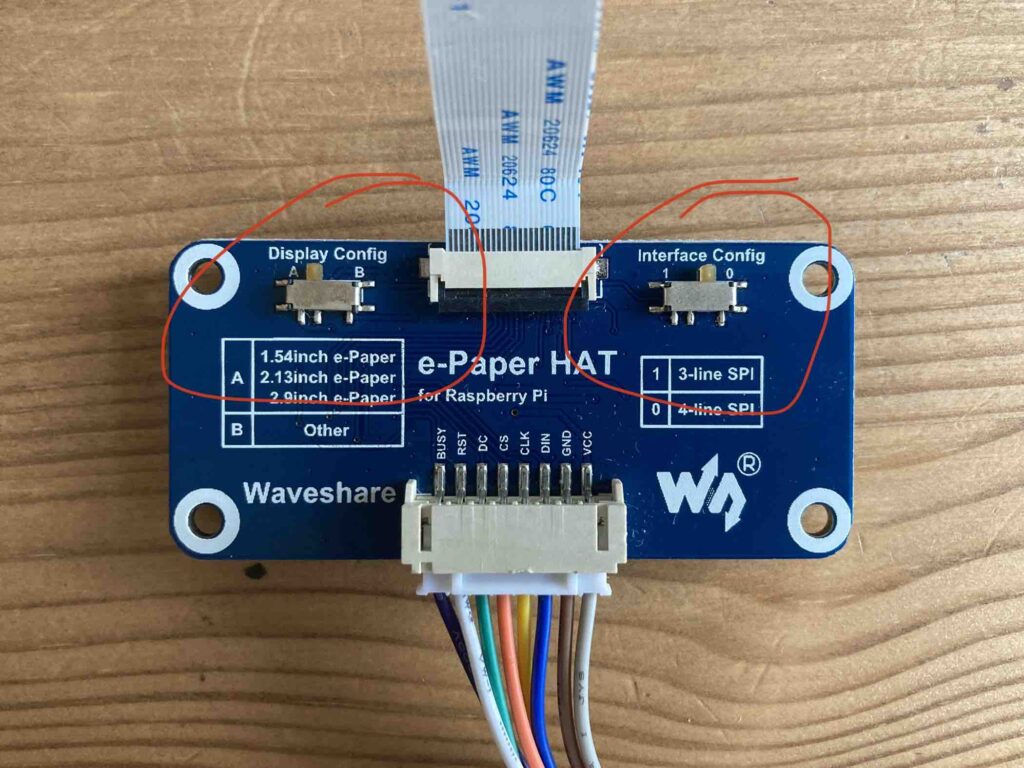
Before running the test make sure that your screen adapter switches are set to A and 0.
To run the example file:
$ cd ~
$ cd e-Paper/RaspberryPi_JetsonNano/python/examples/
$ sudo python3 ./epd_2in13_V2_test.py
If everything is set up correctly you should see something like this:
Everything looks fine? Great!
Now you have to go to your config.ini file:
$ cd ~
$ nano ~/.lightningATM/config.ini
When the file is opened, change display variable to waveshare2in13
See below:
# Define what screen you are using with the ATM
# Current options are:
# display = papiruszero2in
# display = waveshare2in13
display = waveshare2in13
Confirm with Crtl + x and y to save the changes.
That’s it!
Now start your Lightning ATM again.
$ cd ~/LightningATM/
$ ./app.py
You should now see this on the screen:
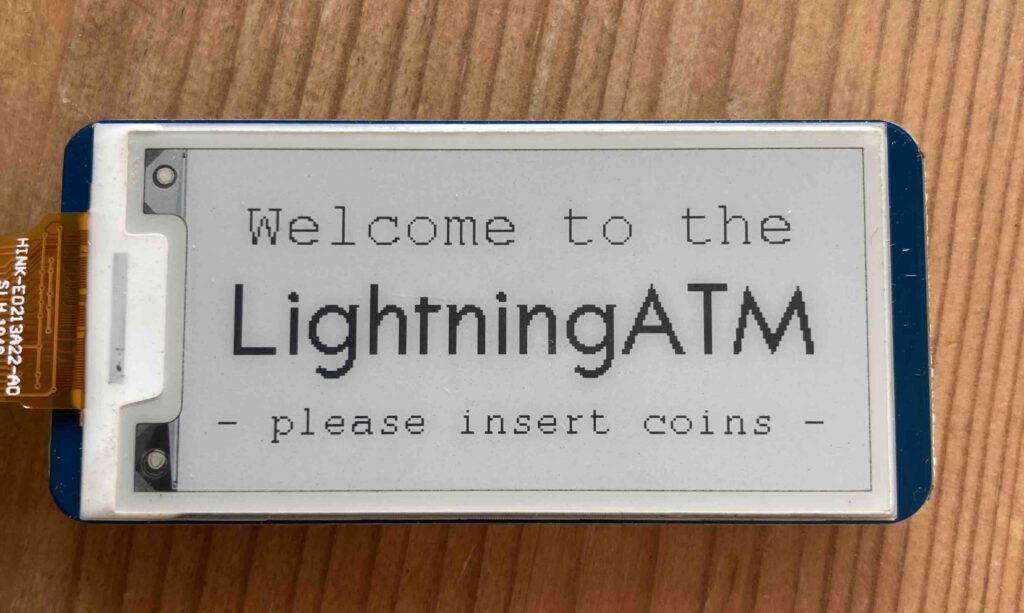
And we’re done! I hope this was explained easy and logical enough.
Additional tips
- Since the Pocket Edition doesn’t have a button I would also change the
payoutdelayvariable in theconfig.inito something more than0. - If you want to change the coin correspondence to the pulses generated by the coin acceptor you can change this in the
app.pyfile.
    if config.PULSES == 2:
        config.FIAT += 0.02
        config.COINCOUNT += 1
        config.SATS = utils.get_sats()
        config.SATSFEE = utils.get_sats_with_fee()
        config.SATS -= config.SATSFEE
        logger.info("2 cents added")
        display.update_amount_screen()
    if config.PULSES == 3:
        config.FIAT += 0.05
        config.COINCOUNT += 1
        config.SATS = utils.get_sats()
        config.SATSFEE = utils.get_sats_with_fee()
        config.SATS -= config.SATSFEE
        logger.info("5 cents added")
        display.update_amount_screen()
    if config.PULSES == 4:
        config.FIAT += 0.1
        config.COINCOUNT += 1
        config.SATS = utils.get_sats()
        config.SATSFEE = utils.get_sats_with_fee()
        config.SATS -= config.SATSFEE
        logger.info("10 cents added")
        display.update_amount_screen()
    if config.PULSES == 5:
        config.FIAT += 0.2
        config.COINCOUNT += 1
        config.SATS = utils.get_sats()
        config.SATSFEE = utils.get_sats_with_fee()
        config.SATS -= config.SATSFEE
        logger.info("20 cents added")
        display.update_amount_screen()
    if config.PULSES == 6:
        config.FIAT += 0.5
        config.COINCOUNT += 1
        config.SATS = utils.get_sats()
        config.SATSFEE = utils.get_sats_with_fee()
        config.SATS -= config.SATSFEE
        logger.info("50 cents added")
        display.update_amount_screen()
    if config.PULSES == 7:
        config.FIAT += 1
        config.COINCOUNT += 1
        config.SATS = utils.get_sats()
        config.SATS = utils.get_sats()
        config.SATSFEE = utils.get_sats_with_fee()
        logger.info("100 cents added")
        display.update_amount_screen()
    config.PULSES = 0
I hope this guide was helpful. Please let me know if you find any mistakes or if you have any advice for improvements.
If you are searching for a case, or a construction set for the Pocket Edition you can buy one in the FULMOShop.
And, of course, you can pay with Lightning!